LANGUAGE  
MEMBERS
Forgot your password?
NOT REGISTERED YET?
WHAT CAN I DO?
- Add a model to my Showroom (need to Login or Register)

- View my Favourite Showrooms

- Search for other members' Showrooms

- To know other members from Community

- Browse our Forums

TODAY IN MODELERSITE.COM
See more >>
MODELER SITE - THE MAGAZINE

 
MAILING
If you want to be noticed about updates, please join your email to the list.
SUBMIT YOUR E-MAIL
  TECHNIQUES
>> Airbrushing: FAQ
>> A weathering technique using salt
>> Applying decals on cars and motorcycles
>> Building a  vacu airplane kit
>> Equivalences for racing colours with Tamiya.
>> Giving a rusty finishing to military vehicles
>> How to build a model kit
>> How to build a car model with open doors
>> How to paint with lacquers
>> Learning how to paint faces with acrylics
>> How to make a tarpaulin for military vehicles
>> Modelling a bust, Step by step
>> Modelling tips for newcomers
>> Painting a figure step by step
>> Painting, the key to plastic modelling.
>> Painting wheels for military in five steps
>> Placing tracks in the Tamiya's T-55
>> Realistic Fork Tubes for 1/12 scale motorcycles
>> Realistic chipped paint in military
>> Scratch Building helmets for cars and motorcycles
>> Spray booth, design and fan selection
>> T-34 Round-up. All the info and versions
>> Tamiya's paint to FS and Humbrol conversion chart
>> The "Weathering"
>> Weathering with the sponge technique
>> Weathering using pigments... step by step
>> Weathering tricks in airplanes for novice modellers
>> Wheels in F1 car models
>> Working with Alclad paints

Modelersite.net - These pages including all artwork are copyrighted 2006/2010 - Sitemap
 
Armor  Formula one  Cars  Motorcycles  Airplanes  Other 
 

Scale-Master Showroom Favourites Login Register
 

1969 Camaro Part 01

Kit / Model  

Not available

Manufacturer  

Not available

Item Code  

Not available

Scale  

1/12

Description  

I started this original issue Monogram Camaro back in the ‘90s. I was swapping in a Big-Block 427 to replace the kit's Small Block 302 and putting a C4 Corvette front suspension under the front end.
I machined and made a lot of parts and sub-assemblies before realizing I could not make parts to the level I wanted. Mainly, not having the ability to make small fasteners that would look like they were in scale is the reason I set it aside. I also did not plan out the project as whole, but built it in sub-assemblies learning as I went, but not paying attention to how I would make them all work together. I guess I thought I could just “plug” the new parts into where the original parts went. All fine and dandy… until I made too many changes and lost some mounting points.
So I disassembled much of it and bagged & tagged (thankfully) some of the loose parts. Some ended up in box in my shop. Some (including the body and chassis) sat in a large Frisbee not far from my mill. It is amazing I only lost one piece (that I know of), and found it after only five minutes of looking.
I have decided since I can now make the parts that hindered its progress some 14 plus years ago that it was time to play with it again.
Originally I had planned it to be a mid to late 80’s hot-rodded Camaro. Weekend grudge match racer, possible daily driver, in a similar vein as the way I treated my Camaro back then. Considering what I have done already, I think it wise to continue that path at this point…
Here is the undignified condition of the parts as I began to inventory them today…

Part II click the link

Related URL  

http://www.modelersite.net/viewShowRoom.php?id_contenido=1979

Related URL  

Category  

Cars

Project status  

In progress

Send an E-mail to member  

Only for members

Views  

10218

Facebook  


Leave a comment
Only for registered members
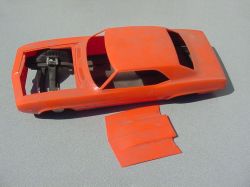
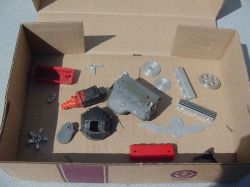
Almost like a barn find.
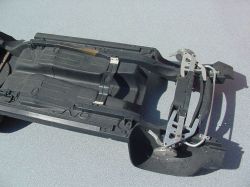
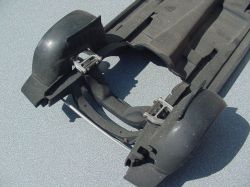
Most of the front monoleaf suspension was machined out of aluminum.
It can be salvaged...
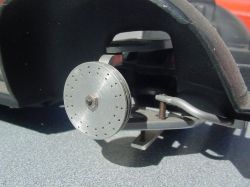
That rotor just looks wrong, they will have to go, but it was the precursor to how I subsequently made the front rotors on one of the Super Sevens, so it served its purpose in the long run…
This box has the identifiable if not usable parts panned from the Frisbee… Mostly engine/trans items.
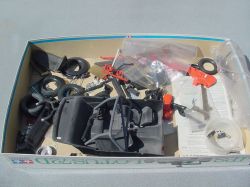
This box of parts was semi protected by some plastic bags and has been sitting at the end of my workbench over a dozen years. Mostly interior and small sub-assemblies…
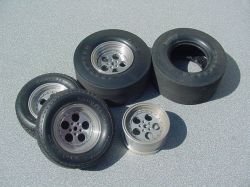
I had machined the wheels from aluminum, the front tires are from the kit, the rears are also from the kit, but cut and spliced from two sets to make them wider. The one loose rim has been sitting on a shelf in my garage since it was made. Time to do some clean up…
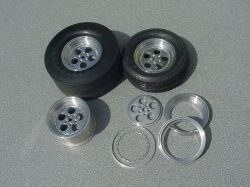
The wheels cleaned up pretty well. You can see how many machined parts make up a wheel.
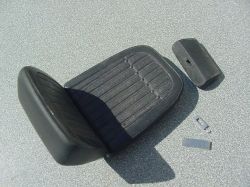
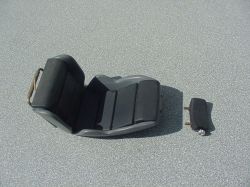
Much like my real Camaro, this one will retain the stock passenger seat. I had separated the headrest from the kit seat and machined the headrest hardware.
Also like mine, the driver’s seat is an aftermarket item. I scratch-built this one, mostly from sheet plastic and polyester filler. The mounting rails are brass and functional to a degree. Other items are machined aluminum. It still needs plenty of finish work…