Kit / Model
Yamaha YZR-M1 2004
Manufacturer
Tamiya
Item Code
14100
Scale
1/12
Description
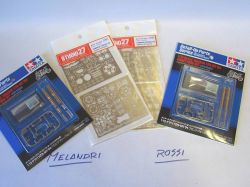
First of all... I don’t want to spend any word regarding these TAMIYA kit because I believe that everybody knows the high quality level of this Japanese company. These are the first two bikes I built and because I like to know as much as I can about the model, the first thing I usually do is to look for in Magazines and Internet all the reference materials I need. The photos I find help me to add some details not included in the original kit and helps me to catch the right shade of colors as we can see in full size bikes, cars, planes.... Then, I look for all the detailing kit regarding the model I’m going to build and, in this case, I used a set of P.E. parts from STUDIO27, Hose Joint Set from MODELER’S, a sheet of Carbon decal, and the Front Fork Set from TAMIYA. I recommend these detailing sets because they make the difference between a toy and a model... Building I started with the engines. I used different kind of aluminium Tamiya Acrylic colors to paint any single part as I saw in the full size photos, then I washed it with diluted black just to give a real touch... I added the plug wire and the oil joints and pipes not included in the kits. I built the air box and I covered it with carbon decal... this was one of the hardest works I did.... because of the carbon decal high thickness, it was very difficult to follow the shape of all the small pieces. The exhausts are quite simple to build but not to paint.... First of all I painted them with ALCLAD Stainless steel, I airbrushed some sand yellow and then some violet just in the points where the temperature is very high (near the engine head, in the corners and near the exit). Finally I built the main shell, the tail and the fuel tank. As you can see in the pictures I added two over-flow pipes with retaining clamps over the fuel tank... Quite simple to add and very beautiful to see. Conclusion My target is making a model that looks like the real one as much as possible and the 1/12 scale give us the possibility to superdetail the model as the real one, but I think that you can spoil your work if you don’t pay attention to the two most important things: The shade of colors and the thickness of all the pieces, pipes and wire. For example, don’t forget that the Black in full-size becomes Dark grey in scale and the White becomes light grey.... Don’t forget that the windshield thickness is about 5 mm. in full-size, so 0,4 mm. in 1/12 scale.... The brake oil pipes are about 10 mm. in
Category
Motorcycles
Project status
Finished
Send an E-mail to member
Only for members
Views
11555
Facebook