IDIOMA  
MIEMBROS
¿Olvidó su clave?
¿AúN NO ESTá REGISTRADO?
¿QUé PUEDO HACER?
- Agregar un modelo a mi Showroom (necesita Identificarse o Registrarse)

- Ver mis Showrooms Favoritos

- Buscar Showrooms de otros miembros

- Conocer otros miembros de la Comunidad

- Navegar nuestros Foros

HOY EN MODELERSITE.COM
Ver más >>
MODELER SITE - LA REVISTA

 
CORREO
Si quiere recibir noticias acerca de las actualizaciones, por favor agregue su email a la lista.
ENVIE SU E-MAIL
  TéCNICAS
>> Algunos trucos
>> Aplicando calcas
>> Blindados: Técnica de la sal
>> Como construir modelo de auto con las puertas abiertas
>> Cómo se construye un modelo
>> Confección de una lona para vehículos militares
>> Construyendo cascos en "scratch"
>> Construyendo a kit Vacu en 1/48
>> Desgastes con la técnica de la esponja
>> Detallando amortiguadores en motos escala 1/12
>> El "Weathering"
>> Ensuciado usando pigmentos paso a paso
>> Equivalencias de colores de competición para pinturas Tamiya
>> Las cadenas en los T55
>> Modelado de un busto, Paso a paso
>> Pintando caras con acrílicos
>> Pintando con lacas automotivas
>> Pintando ruedas en 5 pasos
>> Pintando una figura paso a paso
>> Pintar ¿es la clave del modelismo estático?
>> Realizando pintura saltada
>> Realizando terminaciones oxidadas en vehículos militares
>> Ruedas!
>> T-34/76 Round up de kits 1/35, todas las versiones
>> Tabla de conversión de Tamiya a Humbrol y FS
>> Trabajando con Alclad2
>> Trucos para desgastes para modelistas novicios
>> Utilizando la masilla: una guía para novicios

Esta página incluso todo el arte gráfico es propiedad registrada 2006/2010 - Sitemap
 
Blindados  Fórmula uno  Autos  Motos  Aviones  Otros 
 

Bertone Showroom Favoritos Identificarse Registrarse
 

How to make a customized aileron

Kit / Modelo  

Not available

Fabricante  

Not available

Código de Producto  

Not available

Escala  

1/24

Descripción  

On many occasions when we decide to build a customized vehicle, we realized that we did not have all the necessary parts.

After some time trying to gather that material for the project, the imagination and talent help us to create the things we really need, and this is why I’ll let you know this technique that without any doubt will be of great help.

Materials needed for this aileron:

Plasticard sheets ( I used Evergreen ones cause this material is malleable and can be shaped under heat without problem)
Glue
Metal rod
Putty
Sand


To start with this task, I took a piece of plasticard cut to size, this piece will be the base; then another piece was cut with the necessary width but a little shorter and was glued as can be appreciated in the image.

URL Relacionada  

URL Relacionada  

Tipo de sujeto  

Autos

Estado  

Técnicas

Envíe un E-mail al miembro  

Solo para miembros

Vistas  

9081

Facebook  


Dejar un comentario
Solo para miembros registrados
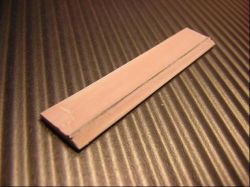
You may give the wished aileron shape with the help of a hair-dryer, getting in this way another profile.
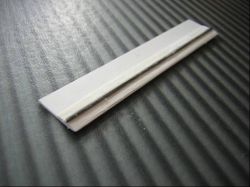
As shown in the picture, once this step was finished a metal rod was added on the top for strengthen and to maintain the shape.
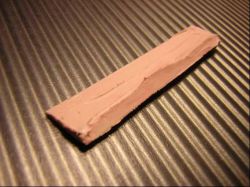
Next, the part was puttied and sanded to shape.
If you’ve followed all these steps, you’ll get this result:
Then, you can also customize the rear aileron by painting it or adding decals.