LANGUAGE  
MEMBERS
Forgot your password?
NOT REGISTERED YET?
WHAT CAN I DO?
- Add a model to my Showroom (need to Login or Register)

- View my Favourite Showrooms

- Search for other members' Showrooms

- To know other members from Community

- Browse our Forums

TODAY IN MODELERSITE.COM
See more >>
MODELER SITE - THE MAGAZINE

 
MAILING
If you want to be noticed about updates, please join your email to the list.
SUBMIT YOUR E-MAIL
  TECHNIQUES
>> Airbrushing: FAQ
>> A weathering technique using salt
>> Applying decals on cars and motorcycles
>> Building a  vacu airplane kit
>> Equivalences for racing colours with Tamiya.
>> Giving a rusty finishing to military vehicles
>> How to build a model kit
>> How to build a car model with open doors
>> How to paint with lacquers
>> Learning how to paint faces with acrylics
>> How to make a tarpaulin for military vehicles
>> Modelling a bust, Step by step
>> Modelling tips for newcomers
>> Painting a figure step by step
>> Painting, the key to plastic modelling.
>> Painting wheels for military in five steps
>> Placing tracks in the Tamiya's T-55
>> Realistic Fork Tubes for 1/12 scale motorcycles
>> Realistic chipped paint in military
>> Scratch Building helmets for cars and motorcycles
>> Spray booth, design and fan selection
>> T-34 Round-up. All the info and versions
>> Tamiya's paint to FS and Humbrol conversion chart
>> The "Weathering"
>> Weathering with the sponge technique
>> Weathering using pigments... step by step
>> Weathering tricks in airplanes for novice modellers
>> Wheels in F1 car models
>> Working with Alclad paints

Modelersite.net - These pages including all artwork are copyrighted 2006/2010 - Sitemap
 
Armor  Formula one  Cars  Motorcycles  Airplanes  Other 
 

MIKI22 Showroom Favourites Login Register
 

Ferrari Enzo - Construcción parte 1

Kit / Model  

Not available

Manufacturer  

Not available

Item Code  

Not available

Scale  

1/10

Description  

Luego de reunir las 400 piezas, comence a armar. Todo hubo que presentarlo, para verificar que no hubiese diferencias o mal encastre. La tornilleria fue muy importante de controlar ya que un error, en la elección del tornillo, hubiese bastado para arruinar una pieza.
Este kit, consta de una plaqueta para controlar las luces delanteras bajas y las traseras de stop, que se encienden cuando uno acciona la palanca de luces en el volante o el pedal de freno. Tambien tiene accionamiento de la bocina, el arranque y el motor en aceleración, de alli que veran cables saliendo debajo de la consola central. No se que tanto ayuda esto a la calidad del modelo.

Related URL  

Related URL  

Category  

Cars

Project status  

In progress

Send an E-mail to member  

Only for members

Views  

12668

Facebook  


Leave a comment
Only for registered members
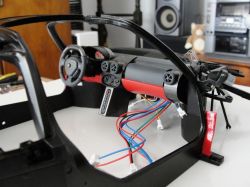
Tablero, volante armados y colocados en el chasis.
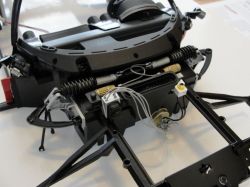
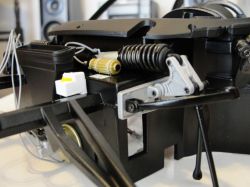
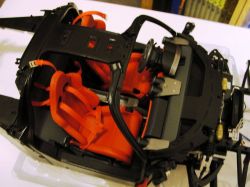
Elementos de la suspension delantera, amortigüadores, parrillas superiores, recipiente de liquido, bomba de freno, espirales.
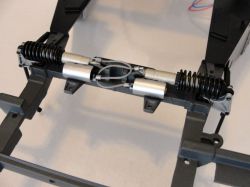
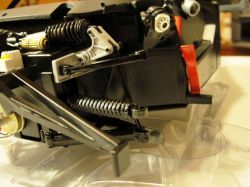
Amortigüadores traseros.
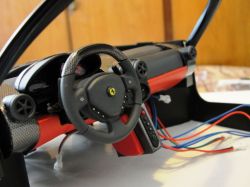
Otra vista del tablero y consola central.
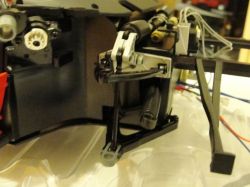
mayor detalle de la suspensión DI
Colocada la parrilla baja DI. Asoma el eje directriz.
Lado DD
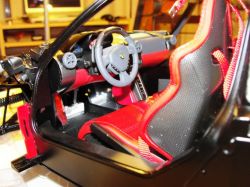
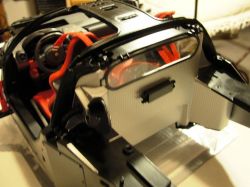
Armado el piso del habitáculo, se incorporaron las butacas, la consola central y los pedales.
Vista superior del habitáculo.
Colocamos la división entre vano motor y habitáculo.