IDIOMA  
MIEMBROS
¿Olvidó su clave?
¿AúN NO ESTá REGISTRADO?
¿QUé PUEDO HACER?
- Agregar un modelo a mi Showroom (necesita Identificarse o Registrarse)

- Ver mis Showrooms Favoritos

- Buscar Showrooms de otros miembros

- Conocer otros miembros de la Comunidad

- Navegar nuestros Foros

HOY EN MODELERSITE.COM
Ver más >>
MODELER SITE - LA REVISTA

 
CORREO
Si quiere recibir noticias acerca de las actualizaciones, por favor agregue su email a la lista.
ENVIE SU E-MAIL
  TéCNICAS
>> Algunos trucos
>> Aplicando calcas
>> Blindados: Técnica de la sal
>> Como construir modelo de auto con las puertas abiertas
>> Cómo se construye un modelo
>> Confección de una lona para vehículos militares
>> Construyendo cascos en "scratch"
>> Construyendo a kit Vacu en 1/48
>> Desgastes con la técnica de la esponja
>> Detallando amortiguadores en motos escala 1/12
>> El "Weathering"
>> Ensuciado usando pigmentos paso a paso
>> Equivalencias de colores de competición para pinturas Tamiya
>> Las cadenas en los T55
>> Modelado de un busto, Paso a paso
>> Pintando caras con acrílicos
>> Pintando con lacas automotivas
>> Pintando ruedas en 5 pasos
>> Pintando una figura paso a paso
>> Pintar ¿es la clave del modelismo estático?
>> Realizando pintura saltada
>> Realizando terminaciones oxidadas en vehículos militares
>> Ruedas!
>> T-34/76 Round up de kits 1/35, todas las versiones
>> Tabla de conversión de Tamiya a Humbrol y FS
>> Trabajando con Alclad2
>> Trucos para desgastes para modelistas novicios
>> Utilizando la masilla: una guía para novicios

Esta página incluso todo el arte gráfico es propiedad registrada 2006/2010 - Sitemap
 
Blindados  Fórmula uno  Autos  Motos  Aviones  Otros 
 

Scale-Master Showroom Favoritos Identificarse Registrarse
 

1969 Camaro Part 03

Kit / Modelo  

Not available

Fabricante  

Not available

Código de Producto  

Not available

Escala  

1/12

Descripción  

Continued progress. See Part 1 for history and intended direction for this project.

Part 4 click the link

URL Relacionada  

http://www.modelersite.net/viewShowRoom.php?id_contenido=1981

URL Relacionada  

Tipo de sujeto  

Autos

Estado  

En construcción

Envíe un E-mail al miembro  

Solo para miembros

Vistas  

9911

Facebook  


Dejar un comentario
Solo para miembros registrados
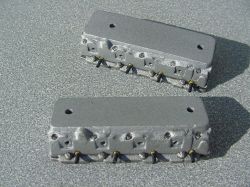
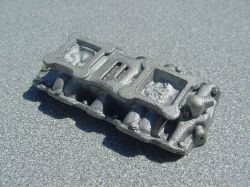
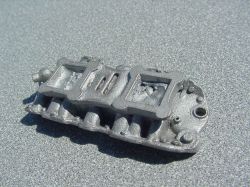
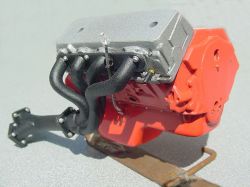
The heads have been reworked. Sand cast texture was added with paint. The spark plug holes were moved since they were located incorrectly and the head bolt locations were drilled out to accept the bolts that were not included in the molded in detail. I machined spark plugs from aluminum, the boots are vinyl tubing. The head bolts were made from hex stock styrene. A little wash was applied to give them a used look.
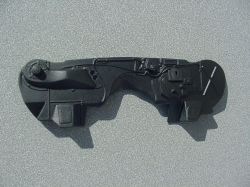
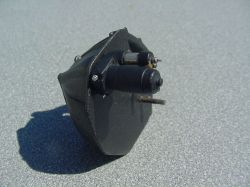
The firewall had two big slots in it for the hood hinges. (One right through the heater box.) I filled them in and reconstructed the heater box and I “hammered†the area that will be behind the distributor for added clearance. (Sure helped on my real one…)
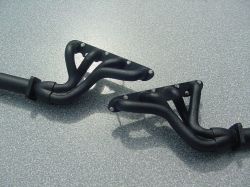
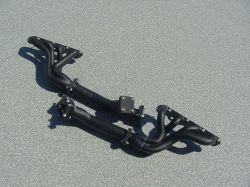
I machined the mounting hardware for the headers from 2024 aluminum. I also cut out the notches in the flanges to allow access/clearance to the repositioned spark plugs…
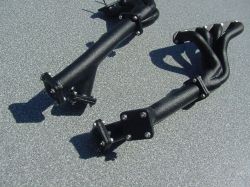
The headers are done, all the hardware is installed.
. I machined all the nuts/bolts/washers from 2024 aluminum.
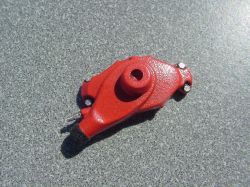
The starter/solenoid is a little high torque unit I scratchbuilt before I shelved the project. Machined a few nuts and bolts for it yesterday… (The stock OEM GM unit would not fit inside the headers.)
I just made the bolts and washers for it (and the studs/nuts/washers for the thermostat housing).
More 2024...
The water pump is done for now. Kit sourced from the ’67 Corvette, with added machined fitting and mounting bolts.
The dipstick tube was made from solder I knurled with a file to look like braided line. The fittings and dipstick handle are machined aluminum (6061).