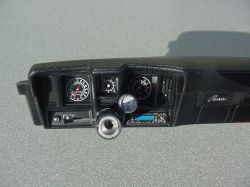
| The dash is done. Iâm not sure where the decals for the gauges went, so I created new ones. I added the stem for the clock and machined the accordion for the crush cage and a tachometer. The tach face came from âThe Official |
|
|
|
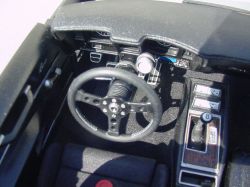
| The steering wheel came from the parts box, I think it is an older Tamiya Porsche item, it looks a lot like the Momo I have on my real one. Just painted the molded in details, and added the stitching to the wrapping⦠|
|
|
|
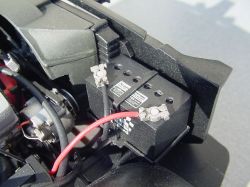
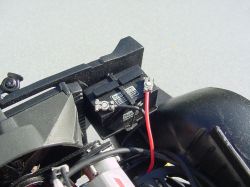
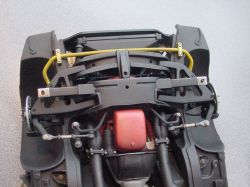
| The battery (another old item fabricated during the âfirst phaseâ of this build) is done and installed. The battery was milled from billet aluminum and the caps are aluminum rod and styrene. They are removable because they can be. |
|
|
|
| The battery clamps were scratchbuilt from styrene, good old fashioned, low-tech basic cutting-filing and cementing together. The clampâs bolts are cut from hex rod. The battery tray was fabricated from sheet aluminum. The hold down is brass and the fastener for the hold down is made from styrene hex rod. Decals are custom made items. |
|
|
|
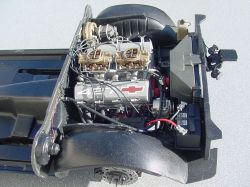
| The throttle linkage is installed. Made of wire for the linkages and return springs and thick foil for the brackets. The adjuster is made from hex styrene and scored to denote the lock nuts. The springs were made by wrapping fine wire around a small drill bit. |
|
|
|
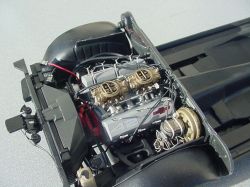
| The T-Bolts for the valve covers are made from aluminum rod and some leftover PE scrap pieces, cut and bent (for the handles) and I punched a small disc for the center âbuttonâ of each one from foil ducting tape, with a tool I made from brass tubing. More low-buck, low-tech-niques⦠|
|
|
|
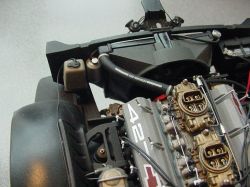
| Also added some hose clamps to the plumbing. |
|
|
|
| The front suspension is done. I made an idler arm since the kit did not provide one and replaced the center section of the tie rod assembly due to the big block conversion. Added more nuts, bolts, washers and fittings⦠and a little more weathering. |
|
|
|
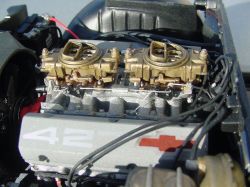
| The engine bay is about done, Iâm sure Iâll find some other details I either forgot or happen to think up. The radiator overflow can is an aftermarket item I machined, still need to add that bolt to the fan shroud⦠|
|
|
|
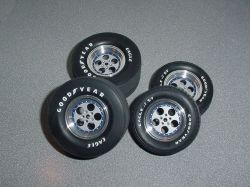
| I painted the lettering on the tires with Testors Insignia white enamel. It does dry contrary to what many seem to think. I have many 20+ year builds done this way, and the paint is still on the tires and not sticky. |
|
|
|