LANGUAGE  
MEMBERS
Forgot your password?
NOT REGISTERED YET?
WHAT CAN I DO?
- Add a model to my Showroom (need to Login or Register)

- View my Favourite Showrooms

- Search for other members' Showrooms

- To know other members from Community

- Browse our Forums

TODAY IN MODELERSITE.COM
See more >>
MODELER SITE - THE MAGAZINE

 
MAILING
If you want to be noticed about updates, please join your email to the list.
SUBMIT YOUR E-MAIL
  TECHNIQUES
>> Airbrushing: FAQ
>> A weathering technique using salt
>> Applying decals on cars and motorcycles
>> Building a  vacu airplane kit
>> Equivalences for racing colours with Tamiya.
>> Giving a rusty finishing to military vehicles
>> How to build a model kit
>> How to build a car model with open doors
>> How to paint with lacquers
>> Learning how to paint faces with acrylics
>> How to make a tarpaulin for military vehicles
>> Modelling a bust, Step by step
>> Modelling tips for newcomers
>> Painting a figure step by step
>> Painting, the key to plastic modelling.
>> Painting wheels for military in five steps
>> Placing tracks in the Tamiya's T-55
>> Realistic Fork Tubes for 1/12 scale motorcycles
>> Realistic chipped paint in military
>> Scratch Building helmets for cars and motorcycles
>> Spray booth, design and fan selection
>> T-34 Round-up. All the info and versions
>> Tamiya's paint to FS and Humbrol conversion chart
>> The "Weathering"
>> Weathering with the sponge technique
>> Weathering using pigments... step by step
>> Weathering tricks in airplanes for novice modellers
>> Wheels in F1 car models
>> Working with Alclad paints

Modelersite.net - These pages including all artwork are copyrighted 2006/2010 - Sitemap
 
Armor  Formula one  Cars  Motorcycles  Airplanes  Other 
 

Scale-Master Showroom Favourites Login Register
 

Another Super Seven (Part 4)

Kit / Model  

Seven Based Custom

Manufacturer  

Scratch

Item Code  

Scratchbuilt Seven

Scale  

1/12

Description  

I decided to make the rear fenders next, but I also decided not to simply stop there and instead I thought I’d add a full rear body section including a trunk. I know, this is not what a Caterham or Lotus Seven would typically have, but since many of the real vehicles are built as kit cars in home garages, I figured why not have some fun? (Not all Seven based cars are Lotus or Caterham…)

Originally I was planning to make the fenders as separate left and right pieces to bolt onto the sides and the center section as its own piece too. But the more I worked on it I decided it will be a rear clip. You can see the mounting flanges on the inside (and the scribed lines on the rear panel) where it was originally going to be three main pieces.

It’s still a little rough on the inside, I may leave some of that as it is the way some 1:1 fiberglass work looks on the inside. It will still use the same mounting points I put on the front sections of the fenders, but the rear will mount to the frame (that I still need to make…).

Related URL  

Related URL  

Category  

Cars

Project status  

In progress

Send an E-mail to member  

Only for members

Views  

5927

Facebook  


Leave a comment
Only for registered members
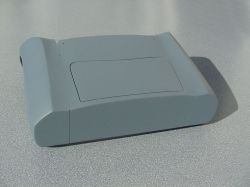
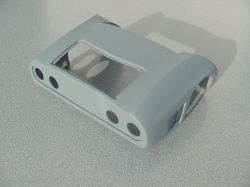
As far as the styling, I’m going for a 60’s or early 70’s sports car look.
It is all styrene except for a little resin and a lot of CA, no “real” filler or putty at this point.
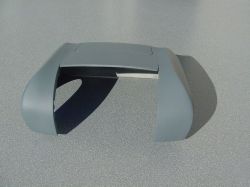
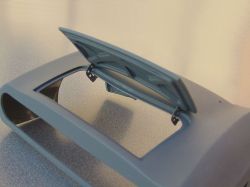
The deck lid has been cut out...
 
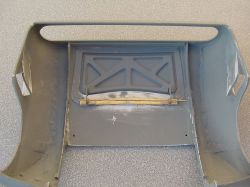
I cut the hole for the taillight panel out; (this will make mounting the deck lid easier).
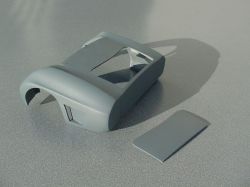
I made the taillight panel and added the ledge for the inside of the trunk…
Taillight panel set in place.
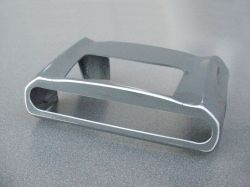
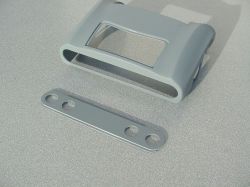
I made the understructure of the deck lid from two layers of sheet styrene. I acid etched the hinge set from brass using artwork I designed.
It is temporarily pinned together with a paper clip