LANGUAGE  
MEMBERS
Forgot your password?
NOT REGISTERED YET?
WHAT CAN I DO?
- Add a model to my Showroom (need to Login or Register)

- View my Favourite Showrooms

- Search for other members' Showrooms

- To know other members from Community

- Browse our Forums

TODAY IN MODELERSITE.COM
See more >>
MODELER SITE - THE MAGAZINE

 
MAILING
If you want to be noticed about updates, please join your email to the list.
SUBMIT YOUR E-MAIL
  TECHNIQUES
>> Airbrushing: FAQ
>> A weathering technique using salt
>> Applying decals on cars and motorcycles
>> Building a  vacu airplane kit
>> Equivalences for racing colours with Tamiya.
>> Giving a rusty finishing to military vehicles
>> How to build a model kit
>> How to build a car model with open doors
>> How to paint with lacquers
>> Learning how to paint faces with acrylics
>> How to make a tarpaulin for military vehicles
>> Modelling a bust, Step by step
>> Modelling tips for newcomers
>> Painting a figure step by step
>> Painting, the key to plastic modelling.
>> Painting wheels for military in five steps
>> Placing tracks in the Tamiya's T-55
>> Realistic Fork Tubes for 1/12 scale motorcycles
>> Realistic chipped paint in military
>> Scratch Building helmets for cars and motorcycles
>> Spray booth, design and fan selection
>> T-34 Round-up. All the info and versions
>> Tamiya's paint to FS and Humbrol conversion chart
>> The "Weathering"
>> Weathering with the sponge technique
>> Weathering using pigments... step by step
>> Weathering tricks in airplanes for novice modellers
>> Wheels in F1 car models
>> Working with Alclad paints

Modelersite.net - These pages including all artwork are copyrighted 2006/2010 - Sitemap
 
Armor  Formula one  Cars  Motorcycles  Airplanes  Other 
 

Scale-Master Showroom Favourites Login Register
 

Another Super Seven (Part 5)

Kit / Model  

Seven Based Custom

Manufacturer  

Scratch

Item Code  

Scratchbuilt Seven

Scale  

1/12

Description  

The oval shaped raised sections on the taillight panel are brass. I acid etched them with a pair of raised rings on the back that aligned with the holes in the taillight panel. I got caught up in assembling them and neglected to take pictures before I permanently installed them…


The lenses were machined from acrylic. Amber for the turn signal/parking lights and clear for the brake lights. The clear parts will be painted transparent red.

Related URL  

Related URL  

Category  

Cars

Project status  

In progress

Send an E-mail to member  

Only for members

Views  

9221

Facebook  


Leave a comment
Only for registered members
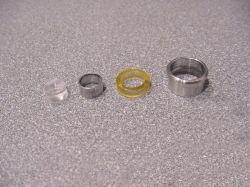
The light bezels were machined from 6061 aluminum to fit into the brass parts.
 
. The trim ring between the lenses is machined from soft aluminum tubing.
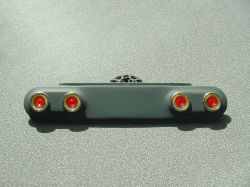
Once I dry assembled the lights into the taillight panel, I decided I wanted the raised oval accent to be more prominent, so I added sheet styrene to those areas and made a fillet of polyester filler.
Here is the dry assembled taillight set in the panel.