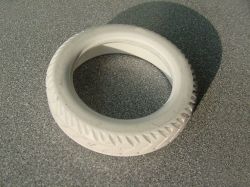
| This is the beginning of the tire master. Again I utilized PVC from the hardware store; this time a plumbing fitting that was just about the right size. It was a little thin on material where I wanted to make the sidewall, so I built it up with some CA so I could have more curvature to the sidewall. |
|
|
|
| I cut the sidewall on the lathe freehand but used traditional tools to cut the bead; the tread was cut on the mill. The tread is patterned after an Advan tire. |
|
|
|
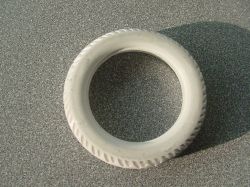
| I added the sidewall detail and lettering. |
|
|
|
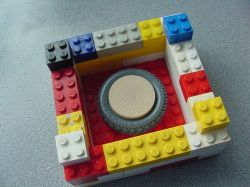
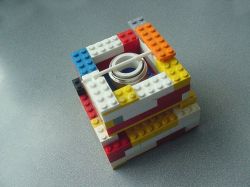
| I use Legos to make my mold frames. (The plug in the center of the tire master is made of Renshape.) |
|
|
|
| Not only are the Legos easy to work with and reusable, they also can be stacked to fit more molds in the vacuum/pressure vessel. This is the rim master on top of the tire master to cast the first half of the molds. |
|
|
|
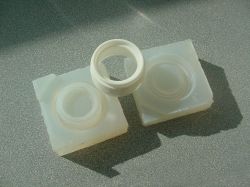
| Here is the mold and a casting from it for the outer rim for the wheels. |
|
|
|
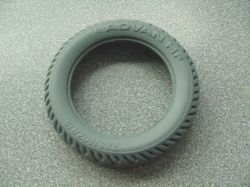
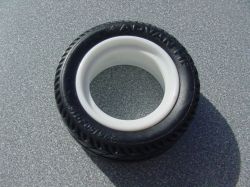
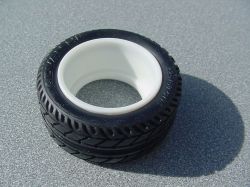
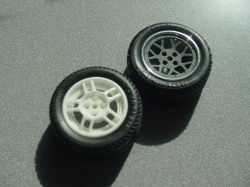
| Here is the first cast tire on the first cast rim outer. I cast both parts from molds I made off masters I created. The tire is hollow and easily stretches over the one piece rim. It is so soft and pliable that it should âsquatâ under the weight of the car. |
|
|
|
| Back: |
|
|
|
| Iâve been casting centers for the wheels too. Still not sure which design Iâll use, the five spoke or the web, or maybe something different all together⦠|
|
|
|
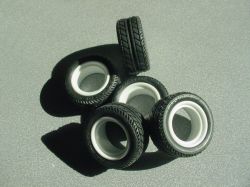
| Hereâs the set of five tires and outer rims I have made for it. Iâm ready to get back to part and pattern making. Prototype work is more rewarding than âproductionâ work. |
|
|
|