LANGUAGE  
MEMBERS
Forgot your password?
NOT REGISTERED YET?
WHAT CAN I DO?
- Add a model to my Showroom (need to Login or Register)

- View my Favourite Showrooms

- Search for other members' Showrooms

- To know other members from Community

- Browse our Forums

TODAY IN MODELERSITE.COM
See more >>
MODELER SITE - THE MAGAZINE

 
MAILING
If you want to be noticed about updates, please join your email to the list.
SUBMIT YOUR E-MAIL
  TECHNIQUES
>> Airbrushing: FAQ
>> A weathering technique using salt
>> Applying decals on cars and motorcycles
>> Building a  vacu airplane kit
>> Equivalences for racing colours with Tamiya.
>> Giving a rusty finishing to military vehicles
>> How to build a model kit
>> How to build a car model with open doors
>> How to paint with lacquers
>> Learning how to paint faces with acrylics
>> How to make a tarpaulin for military vehicles
>> Modelling a bust, Step by step
>> Modelling tips for newcomers
>> Painting a figure step by step
>> Painting, the key to plastic modelling.
>> Painting wheels for military in five steps
>> Placing tracks in the Tamiya's T-55
>> Realistic Fork Tubes for 1/12 scale motorcycles
>> Realistic chipped paint in military
>> Scratch Building helmets for cars and motorcycles
>> Spray booth, design and fan selection
>> T-34 Round-up. All the info and versions
>> Tamiya's paint to FS and Humbrol conversion chart
>> The "Weathering"
>> Weathering with the sponge technique
>> Weathering using pigments... step by step
>> Weathering tricks in airplanes for novice modellers
>> Wheels in F1 car models
>> Working with Alclad paints

Modelersite.net - These pages including all artwork are copyrighted 2006/2010 - Sitemap
 
Armor  Formula one  Cars  Motorcycles  Airplanes  Other 
 

Scale-Master Showroom Favourites Login Register
 

Another Super Seven (Part 14)

Kit / Model  

Seven Based Custom

Manufacturer  

Scratch

Item Code  

Scratchbuilt Seven

Scale  

1/12

Description  

Still building the frame.

Related URL  

Related URL  

Category  

Cars

Project status  

In progress

Send an E-mail to member  

Only for members

Views  

7955

Facebook  


Leave a comment
Only for registered members
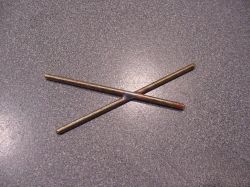
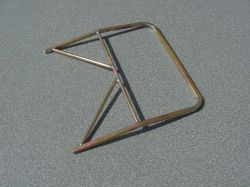
This is one of the two cockpit side X-braces. They had to be notched at the intersection.
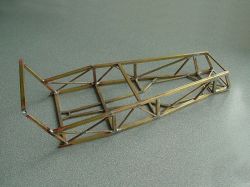
And they are installed…
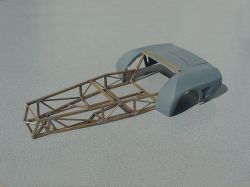
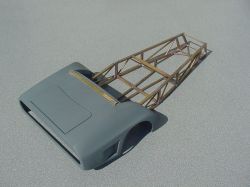
I started fitting the rear body section to the frame so I could take some measurements to build the rear portion of the frame.
Underside.
Rear.
Beginning of the rear section of the frame, this hoop fits into the rear body. It is much longer than a standard Super 7 to accommodate the added bodywork and trunk.
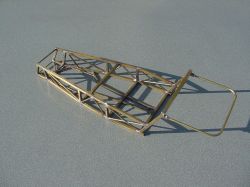
This section plugs into the rear of the main frame.
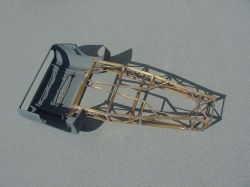
Test fitting the rear body section.