IDIOMA  
MIEMBROS
¿Olvidó su clave?
¿AúN NO ESTá REGISTRADO?
¿QUé PUEDO HACER?
- Agregar un modelo a mi Showroom (necesita Identificarse o Registrarse)

- Ver mis Showrooms Favoritos

- Buscar Showrooms de otros miembros

- Conocer otros miembros de la Comunidad

- Navegar nuestros Foros

HOY EN MODELERSITE.COM
Ver más >>
MODELER SITE - LA REVISTA

 
CORREO
Si quiere recibir noticias acerca de las actualizaciones, por favor agregue su email a la lista.
ENVIE SU E-MAIL
  TéCNICAS
>> Algunos trucos
>> Aplicando calcas
>> Blindados: Técnica de la sal
>> Como construir modelo de auto con las puertas abiertas
>> Cómo se construye un modelo
>> Confección de una lona para vehículos militares
>> Construyendo cascos en "scratch"
>> Construyendo a kit Vacu en 1/48
>> Desgastes con la técnica de la esponja
>> Detallando amortiguadores en motos escala 1/12
>> El "Weathering"
>> Ensuciado usando pigmentos paso a paso
>> Equivalencias de colores de competición para pinturas Tamiya
>> Las cadenas en los T55
>> Modelado de un busto, Paso a paso
>> Pintando caras con acrílicos
>> Pintando con lacas automotivas
>> Pintando ruedas en 5 pasos
>> Pintando una figura paso a paso
>> Pintar ¿es la clave del modelismo estático?
>> Realizando pintura saltada
>> Realizando terminaciones oxidadas en vehículos militares
>> Ruedas!
>> T-34/76 Round up de kits 1/35, todas las versiones
>> Tabla de conversión de Tamiya a Humbrol y FS
>> Trabajando con Alclad2
>> Trucos para desgastes para modelistas novicios
>> Utilizando la masilla: una guía para novicios

Esta página incluso todo el arte gráfico es propiedad registrada 2006/2010 - Sitemap
 
Blindados  Fórmula uno  Autos  Motos  Aviones  Otros 
 

Jamme Showroom Favoritos Identificarse Registrarse
 

WIP Wolf WR1 Tamiya 1/20. Part 4

Kit / Modelo  

Wolf Ford F1

Fabricante  

Tamiya

Código de Producto  

2000?

Escala  

1/20

Descripción  

Here the UP from the W.E.
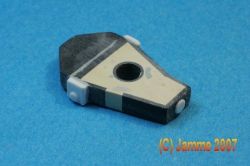
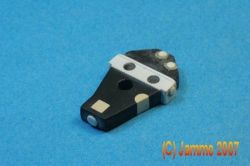
Those are tha parts to build the oilTank, moulded by Tamiya.
This is not correct and he is hollow...;


That's all for now.
Hope to hear from you, guys.
enjoy the pictures.
Waiting for your comments, critics and / or questions.
Cheers,

Jamme

URL Relacionada  

http://www.modelersite.net/viewShowRoom.php?id_contenido=921

URL Relacionada  

Tipo de sujeto  

Fórmula uno

Estado  

En construcción

Envíe un E-mail al miembro  

Solo para miembros

Vistas  

7477

Facebook  


Dejar un comentario
Solo para miembros registrados
 
Here is the oil tank after beginning detailling. I used 2 component putty, plasticard. I used the Punch & Die to make the roundels where the fittings, will be intalled later. Here are the pics:
 
I made the welding seams on the roundels with Miliput. It can't be seen very well on the picture, but, when painted, it will be OK. Still need the welding seams on the oil tank...
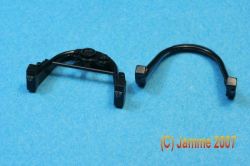
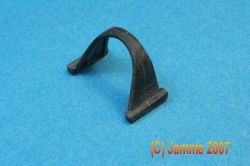
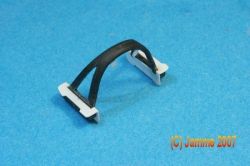
While drying, I began the front rollbar, with the instruments on it. Once again 2 pieces:
The pieces glued together, cleaned. I removed the dashboard. Will made a new one in plasticard.
The piece is now opened. Fairings in plasticard, to be glued later on the bathtub.

Comentarios para este showroom

por: Mario Covalski (marioc) en 2007-09-17 - 08:19

Yes I have a comment, you are brilliant working with plastic and I'm sure we will see ahead a great model.
I love people working with plastic and common materials, all the turned parts are terrific, but finally nobody could follow those steps. I think it would be nice you could comment the size of the plasticard and rods you are using.