IDIOMA  
MIEMBROS
¿Olvidó su clave?
¿AúN NO ESTá REGISTRADO?
¿QUé PUEDO HACER?
- Agregar un modelo a mi Showroom (necesita Identificarse o Registrarse)

- Ver mis Showrooms Favoritos

- Buscar Showrooms de otros miembros

- Conocer otros miembros de la Comunidad

- Navegar nuestros Foros

HOY EN MODELERSITE.COM
Ver más >>
MODELER SITE - LA REVISTA

 
CORREO
Si quiere recibir noticias acerca de las actualizaciones, por favor agregue su email a la lista.
ENVIE SU E-MAIL
  TéCNICAS
>> Algunos trucos
>> Aplicando calcas
>> Blindados: Técnica de la sal
>> Como construir modelo de auto con las puertas abiertas
>> Cómo se construye un modelo
>> Confección de una lona para vehículos militares
>> Construyendo cascos en "scratch"
>> Construyendo a kit Vacu en 1/48
>> Desgastes con la técnica de la esponja
>> Detallando amortiguadores en motos escala 1/12
>> El "Weathering"
>> Ensuciado usando pigmentos paso a paso
>> Equivalencias de colores de competición para pinturas Tamiya
>> Las cadenas en los T55
>> Modelado de un busto, Paso a paso
>> Pintando caras con acrílicos
>> Pintando con lacas automotivas
>> Pintando ruedas en 5 pasos
>> Pintando una figura paso a paso
>> Pintar ¿es la clave del modelismo estático?
>> Realizando pintura saltada
>> Realizando terminaciones oxidadas en vehículos militares
>> Ruedas!
>> T-34/76 Round up de kits 1/35, todas las versiones
>> Tabla de conversión de Tamiya a Humbrol y FS
>> Trabajando con Alclad2
>> Trucos para desgastes para modelistas novicios
>> Utilizando la masilla: una guía para novicios

Esta página incluso todo el arte gráfico es propiedad registrada 2006/2010 - Sitemap
 
Blindados  Fórmula uno  Autos  Motos  Aviones  Otros 
 

Scale-Master Showroom Favoritos Identificarse Registrarse
 

1969 Camaro Part 01

Kit / Modelo  

Not available

Fabricante  

Not available

Código de Producto  

Not available

Escala  

1/12

Descripción  

I started this original issue Monogram Camaro back in the ‘90s. I was swapping in a Big-Block 427 to replace the kit's Small Block 302 and putting a C4 Corvette front suspension under the front end.
I machined and made a lot of parts and sub-assemblies before realizing I could not make parts to the level I wanted. Mainly, not having the ability to make small fasteners that would look like they were in scale is the reason I set it aside. I also did not plan out the project as whole, but built it in sub-assemblies learning as I went, but not paying attention to how I would make them all work together. I guess I thought I could just “plug†the new parts into where the original parts went. All fine and dandy… until I made too many changes and lost some mounting points.
So I disassembled much of it and bagged & tagged (thankfully) some of the loose parts. Some ended up in box in my shop. Some (including the body and chassis) sat in a large Frisbee not far from my mill. It is amazing I only lost one piece (that I know of), and found it after only five minutes of looking.
I have decided since I can now make the parts that hindered its progress some 14 plus years ago that it was time to play with it again.
Originally I had planned it to be a mid to late 80’s hot-rodded Camaro. Weekend grudge match racer, possible daily driver, in a similar vein as the way I treated my Camaro back then. Considering what I have done already, I think it wise to continue that path at this point…
Here is the undignified condition of the parts as I began to inventory them today…

Part II click the link

URL Relacionada  

http://www.modelersite.net/viewShowRoom.php?id_contenido=1979

URL Relacionada  

Tipo de sujeto  

Autos

Estado  

En construcción

Envíe un E-mail al miembro  

Solo para miembros

Vistas  

10248

Facebook  


Dejar un comentario
Solo para miembros registrados
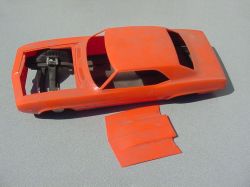
Almost like a barn find.
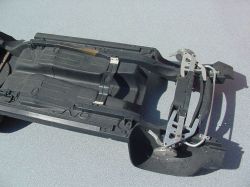
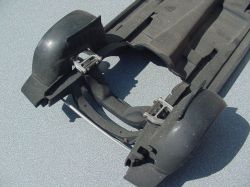
Most of the front monoleaf suspension was machined out of aluminum.
It can be salvaged...
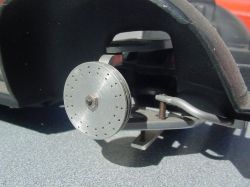
That rotor just looks wrong, they will have to go, but it was the precursor to how I subsequently made the front rotors on one of the Super Sevens, so it served its purpose in the long run…
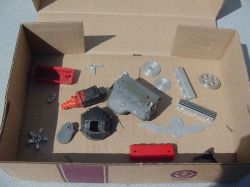
This box has the identifiable if not usable parts panned from the Frisbee… Mostly engine/trans items.
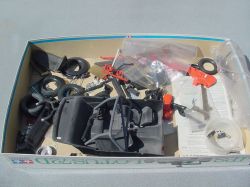
This box of parts was semi protected by some plastic bags and has been sitting at the end of my workbench over a dozen years. Mostly interior and small sub-assemblies…
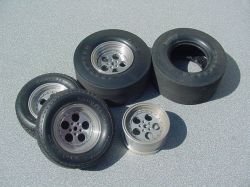
I had machined the wheels from aluminum, the front tires are from the kit, the rears are also from the kit, but cut and spliced from two sets to make them wider. The one loose rim has been sitting on a shelf in my garage since it was made. Time to do some clean up…
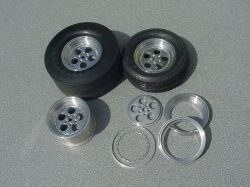
The wheels cleaned up pretty well. You can see how many machined parts make up a wheel.
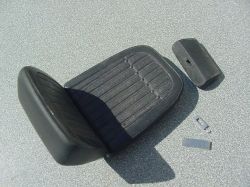
Much like my real Camaro, this one will retain the stock passenger seat. I had separated the headrest from the kit seat and machined the headrest hardware.
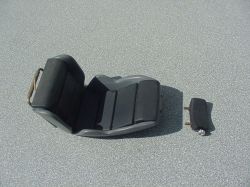
Also like mine, the driver’s seat is an aftermarket item. I scratch-built this one, mostly from sheet plastic and polyester filler. The mounting rails are brass and functional to a degree. Other items are machined aluminum. It still needs plenty of finish work…