LANGUAGE  
MEMBERS
Forgot your password?
NOT REGISTERED YET?
WHAT CAN I DO?
- Add a model to my Showroom (need to Login or Register)

- View my Favourite Showrooms

- Search for other members' Showrooms

- To know other members from Community

- Browse our Forums

TODAY IN MODELERSITE.COM
See more >>
MODELER SITE - THE MAGAZINE

 
MAILING
If you want to be noticed about updates, please join your email to the list.
SUBMIT YOUR E-MAIL
  TECHNIQUES
>> Airbrushing: FAQ
>> A weathering technique using salt
>> Applying decals on cars and motorcycles
>> Building a  vacu airplane kit
>> Equivalences for racing colours with Tamiya.
>> Giving a rusty finishing to military vehicles
>> How to build a model kit
>> How to build a car model with open doors
>> How to paint with lacquers
>> Learning how to paint faces with acrylics
>> How to make a tarpaulin for military vehicles
>> Modelling a bust, Step by step
>> Modelling tips for newcomers
>> Painting a figure step by step
>> Painting, the key to plastic modelling.
>> Painting wheels for military in five steps
>> Placing tracks in the Tamiya's T-55
>> Realistic Fork Tubes for 1/12 scale motorcycles
>> Realistic chipped paint in military
>> Scratch Building helmets for cars and motorcycles
>> Spray booth, design and fan selection
>> T-34 Round-up. All the info and versions
>> Tamiya's paint to FS and Humbrol conversion chart
>> The "Weathering"
>> Weathering with the sponge technique
>> Weathering using pigments... step by step
>> Weathering tricks in airplanes for novice modellers
>> Wheels in F1 car models
>> Working with Alclad paints

Modelersite.net - These pages including all artwork are copyrighted 2006/2010 - Sitemap
 
Armor  Formula one  Cars  Motorcycles  Airplanes  Other 
 

Scale-Master Showroom Favourites Login Register
 

1969 Camaro Part 09

Kit / Model  

Not available

Manufacturer  

Not available

Item Code  

Not available

Scale  

1/12

Description  

Continued progress. See Part 1 for history and intended direction for this project.

Part 10 click the link

Related URL  

http://www.modelersite.net/viewShowRoom.php?id_contenido=1988

Related URL  

Category  

Cars

Project status  

In progress

Send an E-mail to member  

Only for members

Views  

10566

Facebook  


Leave a comment
Only for registered members
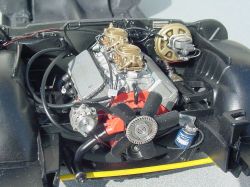
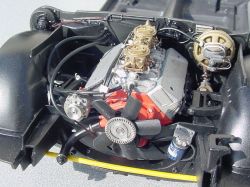
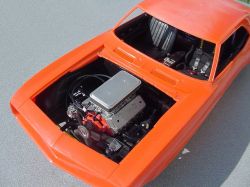
The remote oil filter set up was machined from… (big surprise…) aluminum.
The filter is from the kit, slightly reworked with decals I made.
The carbs are installed and plumbed, still need to make the linkages.
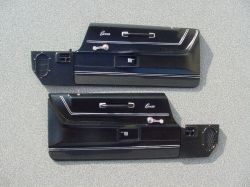
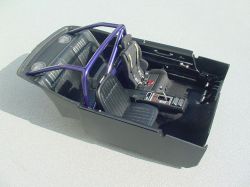
The door panels are ready for installation. I machined the bezels for the locks and used straight pins locks. (Driver’s side is unlocked, passenger side is locked.)I decided to hand paint the silver trim instead of BMF for a “less than brand new” look.
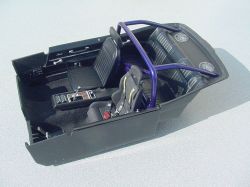
Except for the dash, the interior is done.
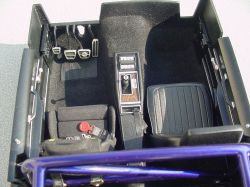
I added a lap belt for the passenger seat...
and an 8-Ball shifter knob.
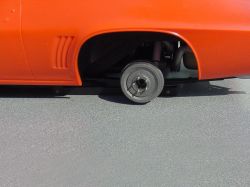
The rear brakes are finished; I went with drums since my real one has them. I made them from mostly CA glue on an aluminum core with a shell of styrene and turned them on the lathe. (CA machines nicely...) The studs are small bolts embedded in the core.
The hardware that mounts the backing plates to the axle tubes and makes up the brake line fittings is more machined aluminum nuts and bolts. The cast texture was added by hand brushing Testors metalizer.Weights have also been added to balance the driveshaft… Don’t want any high speed vibrations, especially with those 4:11 gears.
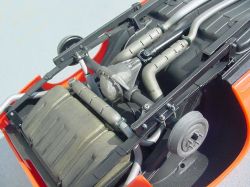
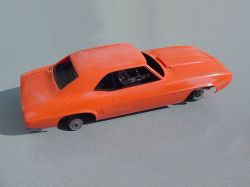
First test fit of the body/interior/chassis to verify my measurements were correct before going on to prepping the body.